First of all, we’ve to download CentOS. CentOS is a freely-available operating system that is based on Red Hat Enterprise Linux system. You can download the latest release (5) from its website. To download, please refer to download page of CentOS web site
Select nearest location and begin downloading *.iso files.
After you finish downloading *.iso files, you have to mount it and let your VMware recognize it as a virtual “cd” or “dvd”. For this purpose, I prefer to download one DVD *.iso installation file. Please open VMware, double click on CD-ROM (IDE 1-0) item, select Use ISO image option and click Browse button to select your recently downloaded *.iso installation file of CentOS as shown below

Now you virtually inserted you installation DVD into DVD-ROM. And you’re ready to install your OS virtually.
You should change your Memory to 1024 MB for your further Oracle installation. Double click on Memory item and set it to 1024
Then click Power button to start your virtual pc
When your virtual pc starts, you’ll see welcome screen of installation CentOS
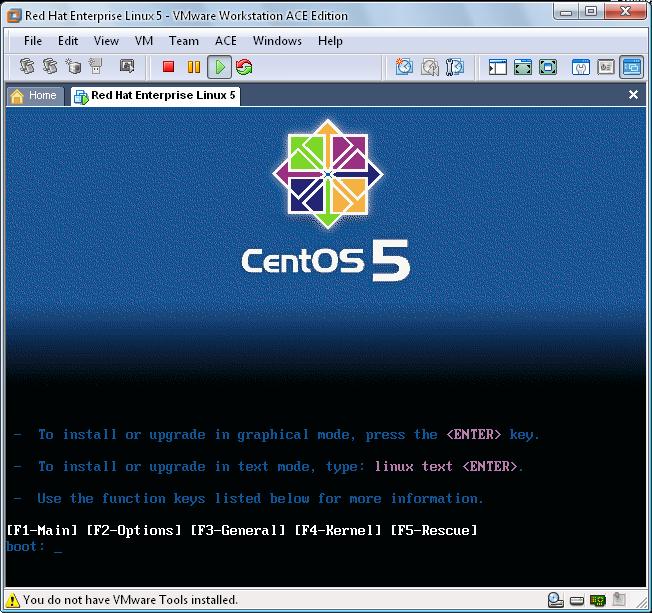
If you’ll not be able to see this screen, then restart your virtual pc and click Esc button for Boot menu. And from this menu, select CD-ROM Drive
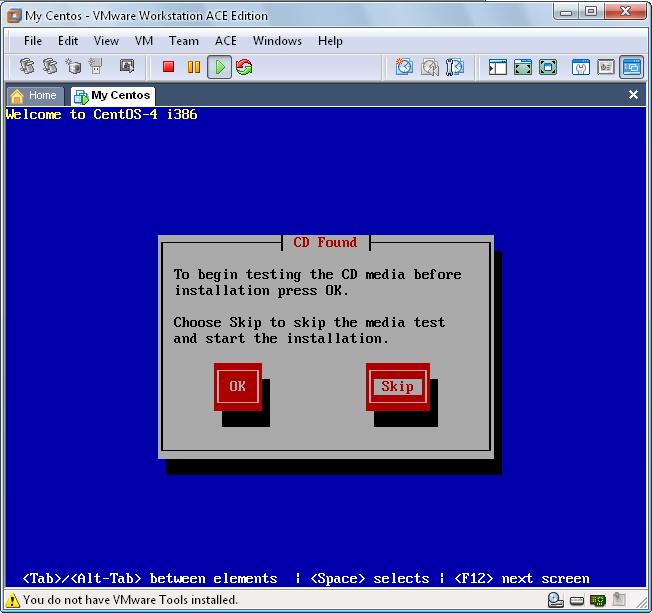
Click enter. The installation will tell you to begin testing of your installation cd or dvd. Select Skip button. It will skip testing your cd media and save your time
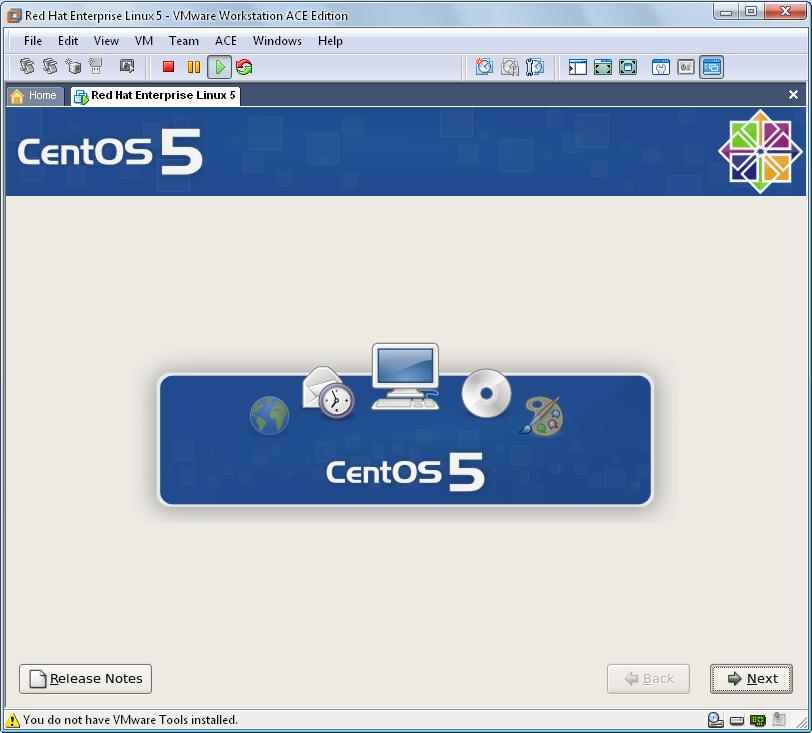
Then you’ll get another welcome screen, you only have to click next button on this screen
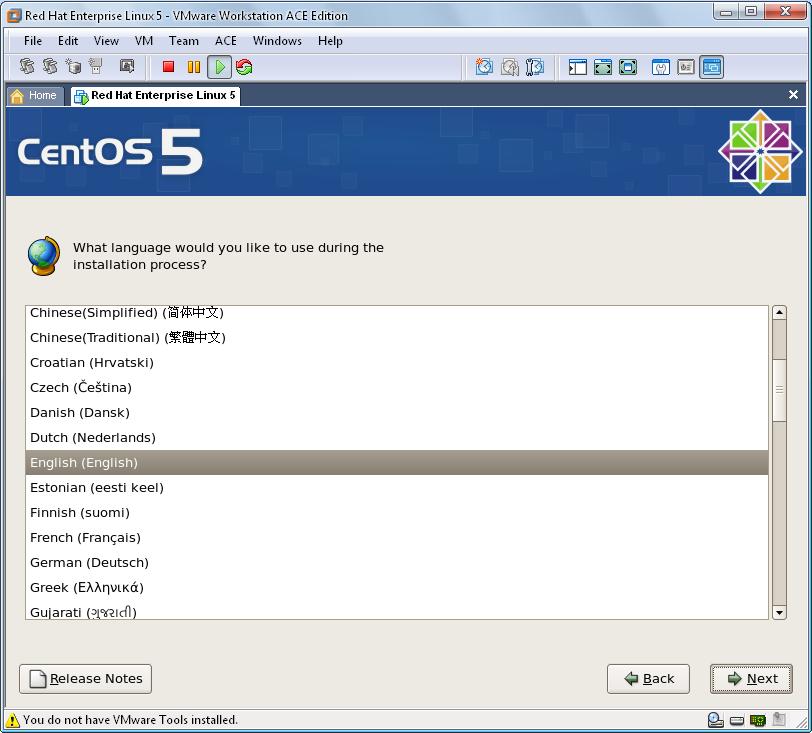
Select your language of installation and click Next
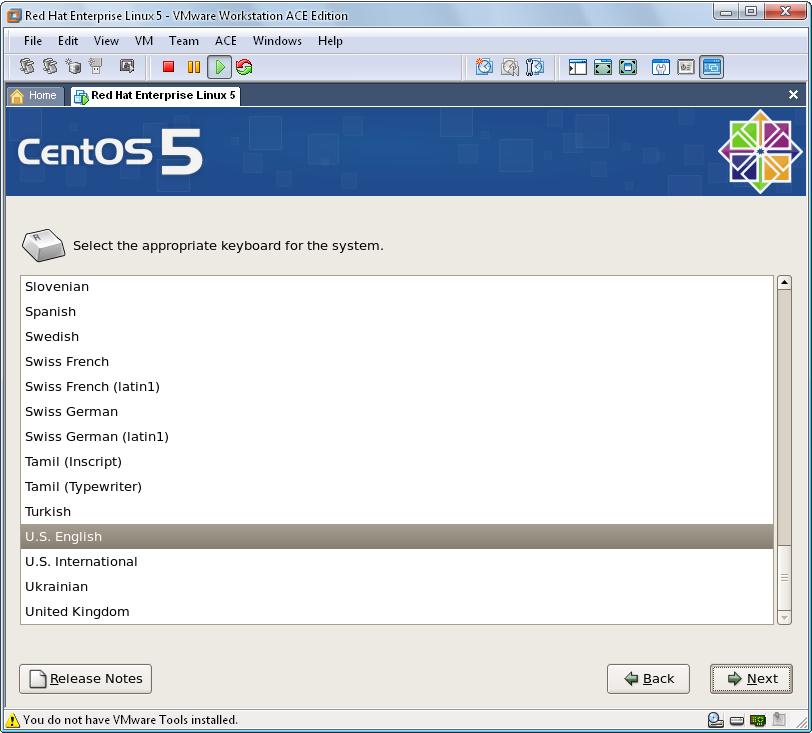
Then, select your keyboard configuration to use it for the system you’re installing and click Next
Then, you’ll be warned to create new partitions by erasing ALL DATA on your newly created hard drive. As there’s no information in this drive, you’ll select Yes

In this step, just let it remain selected and click next

Then there’ll be warning “You have chosen to remove all Linux partitions (and ALL DATA on them) on the following drives: /dev/sda Are you sure you want to do this?” Click Yes
Then, you’ll see Network Configurations screen, as it is your test virtual pc, don’t change anything and click next. You can change whatever you want after installation, for now, let it continue in this way and click Next

From this screen, select your region and click Next

Then, you’ll be prompted to enter password for root user, enter it and click Next

To install packages, especially for working with Oracle Server, select all options except Clustering and Storage Clustering. Then select Customize now option and click Next

Then, from Base System menu, select Legacy Software Support, System Tools and click Next

Now, you’re ready for installation. Click next on this screen, the installation will begin

You’ll see how all packages are installing. After a while, your OS will be ready for use

After the installation is completed, click Reboot button to reboot your OS

After reboot, you’ll face with another Welcome screen. There’re some steps need to be completed
Click Forward button on the screen.

Here, just disable your Firewall. Its only for test purpose, don’t disable your Firewall on real system! And click forward button

For testing purpose, it would be good to disable SELinux too

Then keeping Kdump disabled, click Forward

If you need, make your Date and Time configuration and click Forward

If you want to create a new user, you can fill these blanks. You can pass this step too by clicking Forward button

Then Click Finish and the system will reboot

After reboot, CentOS will be opened and you’ll be prompted to enter username (root) and password (root’s password)

Your Centos is ready to use! Congratulations.

In the next article, I’m going to show installation of Oracle 10g Release 2 on our Centos OS
Additionally, while using an operating system inside VMware, you recognize that every time you have to enter to its area and then press Ctrl+Alt buttons to leave this area and to return to your system.
To solve this issue, you should install VMware Tools.
As the VMware Tools will be installed from CD-Rom device, you should disconnect your connected CD-Rom device as shown below

Next, Select VM menu on VMware application and select Install VMware Tools menu item.

Then click Install button on this message box to Install VMware Tools

Then enter to My Computer and double click on CD-ROM Drive. You’ll see there two packages.

Now, double click on *.rpm file to setup
After installation complete, copy another *.gz file to anywhere in hard drive. In our example we are coping it to tmp directory inside FileSystem, paste the file into this folder, right click on it and select Extract Here menu item

Then enter to the folder vmware-tools-distrib and double click on vmware-install.pl file and click Run in Terminal button

Then, whenever you’re asked to enter the value, just click enter
But when you’re prompted to enter value for the display size of your X, be careful to enter default value. If you want your Virtual Machine to be little size, enter 2 (800-600)
That’s all! Your VMware Tools installed. Now you can enter to VMware’s area and exit it without clicking Ctrl+Alt
P.S. If you’ll face with “VMware hgfs: HGFS is disabled in the host” error, just reboot your system
Tidak ada komentar:
Posting Komentar